Skip to content

Although cast iron has been around for over 2,500 years, its widespread adoption in Europe during the 1500s was revolutionary. For the first time in history, metal items could be quickly and easily produced. While cast iron is brittle, its high thermal conductivity, easy refinement process and high strength have made it the ideal material for many applications.
The downside of cast iron is that its molecular structure makes it a beast to weld. While it can be challenging, cast iron repairs with MIG welding are by no means impossible. However, the right steps must be taken to ensure the weld is executed properly.
Types of Cast Iron
One of the hardest parts about finding information on welding cast iron is that often, articles will treat cast iron as one single material. In reality, there are four main types of cast iron: Grey Cast Iron, White Cast Iron, Ductile Cast Iron (nodular iron) and Malleable Cast Iron.

Grey cast iron is the most common and is generally what comes to mind when someone says “cast iron.” This is your cast iron pans, benchpress weights and 1800s cannons. Grey cast iron has a high amount of carbon in the material, which is part of the reason it can be difficult to weld.
While this article will focus on grey cast iron, it should be noted that Malleable Cast Iron and Ductile Cast Iron will follow many of the same steps. White Cast Iron, however, is considered virtually impossible to weld as it is incredibly brittle at the microstructure level.
Proper Heating
As cast iron is quite brittle, uneven heating can easily cause the metal to crack. Your exact method for pre-heating your piece will depend on several circumstances. For instance, do you have an oven large enough to pre-heat the entire piece or will you have to pre-heat it with a torch? In almost all cases, you want to heat your piece slowly to avoid cracking.

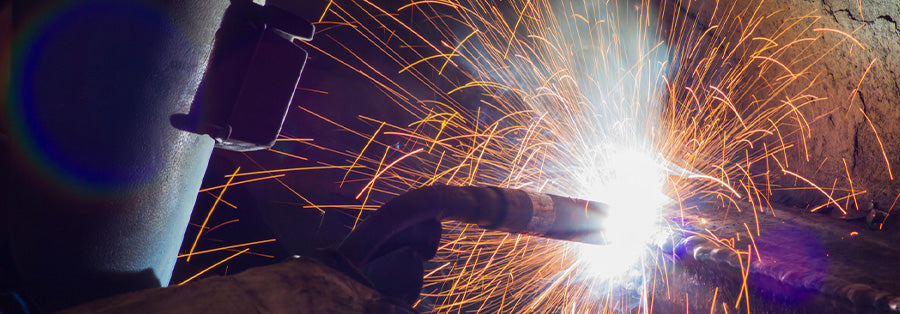
When you do your MIG welding, the less heat you can expose your piece to, the better. This creates a little bit of a balancing act. You want to keep your amperage and speed as slow as possible, but if those settings are too low, you simply won’t achieve good penetration. While cast iron can easily crack with sudden heat changes, it also requires quite a lot of power for a weld to take (since cast iron has such high thermal conductivity). In fact, many experts recommend using a MIG machine that can do at least 200 amps. Luckily, that amount of power is possible with many of our favorite MIG welders including the Millermatic 211, the Lincoln Power MIG 215 and the ESAB Rebel 215ic.
The ideal solution is to practice on a spare piece of identical cast iron material until you can find the right balance. If you don’t have any spare material, make sure you follow the steps below for doing short, quick beads. This will let you dial in your settings as you go.
Executing a Proper Cast Iron Weld
Before you start welding, you’ll want to make sure you have the right consumable. We’d recommend using a nickel-based wire or an option that specifically states it’s designed for cast iron.
You’ll also want to make sure the area you’re welding is properly cleaned of any moisture or contaminants. To learn more about preparing your weld piece, check out our post here.
Once you have your pre-heating completed and your settings dialed in, it’s best to weld cast iron in short bursts. Again, cast iron requires quite a bit of power for the weld to take, but sudden heat changes will cause cracking. Many experts will do a short bead (almost like a tack), then let the weld cool. Often while it cools, they will peen the weld.

Peening is a bit of a tricky subject as it has both pros and cons. Peening means to take a peen hammer and tap your weld with the ball end as it cools. This compresses the surface of the weld and relieves some of the stresses that can cause major cracks. This makes peening ideal for cast-iron welding since it’s so prone to cracking. However, peening can have a complicated effect on your material, hardening it in unintended ways. This is why peening is often not allowed by many welding codes and has very specific regulations when used for structural welds.
So should you use peening when welding cast iron? Here’s the honest answer: If you’re welding something to code, you need to follow the exact regulations and processes required. But if you’re welding Grandma’s priceless cast iron pan or most other projects where there’s no legal procedure that must be followed, peening is ideal for preventing cracking.
The actual timing for your peening is debatable. Many experts will state you should pre-heat, weld a little and then peen your weld as it cools down. Then you repeat the process: Weld a little, peen as it cools down, weld a little, peen, etc.
Cooling Down
Once you’ve completed your welds, the challenge isn’t over. If the cast iron piece is cooled too quickly, it can crack. For most projects, you can allow them to naturally cool down in a room-temperature space. Do not quench cast iron in water or any other liquid that would cause a sudden temperature change.

When it comes to MIG welding cast iron, patience is the name of the game. With cast iron’s brittle characteristics, going slow and steady is key. That being said – no matter how slow you go – without the right equipment, you won’t be able to weld cast iron. Check out our top-rated MIG machines and our wire designed for cast iron welds.